
Introduction to DIY Baby Crib Mobiles
Welcoming a new baby into the world is an exciting time. One of the joys of parenthood is preparing the nursery. A baby crib mobile is a staple in many nurseries. These charming accessories not only add a decorative touch but also serve a functional purpose. They can soothe a fussy baby and even stimulate their developing senses. In recent years, DIY baby crib mobiles have become increasingly popular. Let’s explore why this is the case and the benefits they offer.
- Why DIY Baby Crib Mobiles are popular
- Benefits of DIY Baby Crib Mobiles
DIY baby crib mobiles are gaining popularity for several reasons. Firstly, they allow parents to personalize their baby’s nursery. With a DIY mobile, you can choose the colors, shapes, and themes that best fit your nursery decor. Secondly, making a baby crib mobile can be a fun and rewarding project. It’s a chance to put your creativity to use and make something unique for your baby. Lastly, DIY baby crib mobiles can be a cost-effective alternative to store-bought versions. With some basic materials and a bit of time, you can create a beautiful mobile that doesn’t break the bank.
Aside from their popularity, DIY baby crib mobiles offer several benefits. One of the main advantages is the opportunity to create a one-of-a-kind piece. Your baby’s mobile will be unique to them, adding a special touch to their nursery. DIY mobiles also give you the chance to use safe, non-toxic materials, ensuring your baby’s well-being. Additionally, the process of making the mobile can be therapeutic. It can provide a sense of accomplishment and serve as a creative outlet during the busy period of preparing for a baby. Lastly, DIY baby crib mobiles can be a wonderful keepsake to cherish as your child grows.
Getting Started with DIY Baby Crib Mobiles
Creating your own DIY baby crib mobiles is a fun and rewarding project. Not only does it allow you to add a personal touch to your nursery decor, but it also provides a stimulating and engaging element for your baby. In this section, we will discuss the materials needed for DIY baby crib mobiles and where you can find them.
Materials Needed for DIY Baby Crib Mobiles
Before you begin creating your DIY baby crib mobile, you’ll need to gather some materials. Here’s a list of what you’ll need:
- Selection of materials: The materials you choose will depend on the design of your baby crib mobile. Common materials include felt, fabric, thread, beads, ribbons, and wooden or plastic rings. You’ll also need a mobile hanger, which you can either buy or make yourself.
- Where to buy materials: You can find most of these materials at your local craft store. Online marketplaces like Amazon and Etsy also have a wide selection of materials. For more unique or specialized items, you might want to check out specialized craft stores or online shops that cater to DIY enthusiasts.
Remember, the key to a successful DIY project is creativity and patience. Don’t be afraid to experiment with different materials and designs. The most important thing is that you enjoy the process and create something that you and your baby will love.
Setting Up Your Workspace
Before you start creating your DIY baby crib mobile, it’s essential to set up your workspace properly. This involves two key steps: choosing the right space and organizing your materials.
- Choosing the Right Space
First, you need to find a suitable area for your DIY project. This should be a well-lit, comfortable, and quiet space where you can focus on your work. Ideally, it should have a flat surface, like a table or a desk, where you can spread out your materials. It’s also a good idea to choose a space that’s out of reach of small children and pets to ensure safety.
- Organizing Your Materials
Once you’ve chosen your workspace, the next step is to organize your materials. Having everything in its place will make your DIY project go more smoothly and efficiently. Here’s a simple way to do it:
| Step | Action |
|---|---|
| 1 | Gather all the materials you need for the project. |
| 2 | Sort them by type. For example, keep all the threads together, all the beads together, and so on. |
| 3 | Place the materials in containers or trays. This will help you keep track of them and prevent them from getting lost or mixed up. |
| 4 | Label the containers or trays, so you know where everything is. |
Remember, a well-organized workspace will not only make your DIY project easier but also more enjoyable. So take the time to set it up properly before you start.
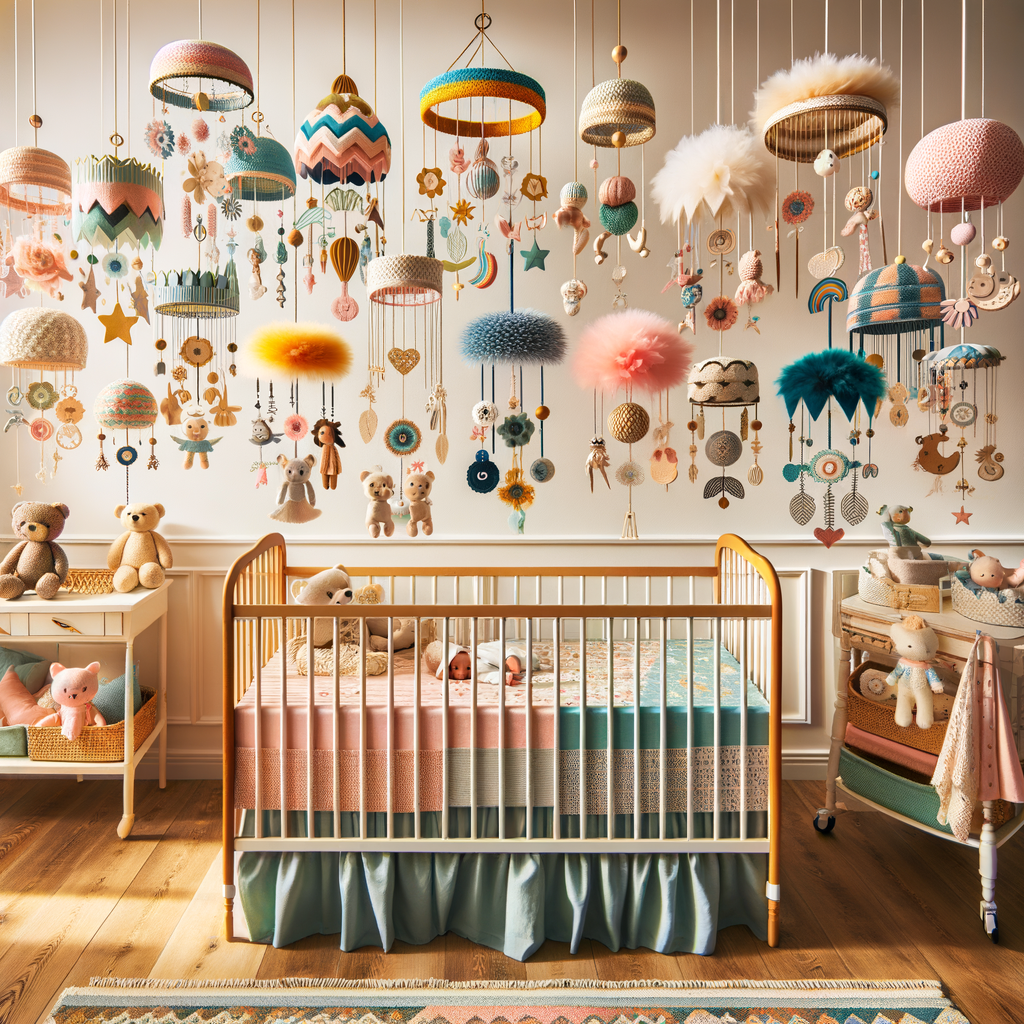
Creative Baby Mobile Ideas
When it comes to decorating your baby’s nursery, the mobile is a key element that not only adds a touch of charm but also stimulates your baby’s senses. Here, we explore some creative theme-based baby mobile ideas that are sure to inspire you.
Theme-Based Baby Mobiles
Theme-based baby mobiles are a great way to introduce your little one to different elements of the world. They can be both educational and fun, and they add a cohesive look to your nursery decor. Here are a few ideas:
- Animal-Themed Baby Mobiles
- Nature-Themed Baby Mobiles
- Space-Themed Baby Mobiles
An animal-themed baby mobile can be a great way to introduce your baby to different animals. You could choose a specific type of animal, like birds or farm animals, or go for a mix. This type of mobile can also serve as a fun way to teach your child about different animals as they grow.
A nature-themed baby mobile can bring a touch of the outdoors into your baby’s nursery. This could include elements like trees, flowers, clouds, or even raindrops. This type of mobile can be very calming and is a great way to introduce your baby to the beauty of nature.
For those who want to inspire a sense of wonder and curiosity, a space-themed baby mobile is a fantastic choice. This could include elements like stars, planets, rockets, and astronauts. It’s a fun way to introduce your baby to the concept of space and could spark a lifelong interest in science.
Remember, the most important thing is to choose a mobile that you love and that fits with the overall theme of your nursery. Happy decorating!
Color-Based Baby Mobiles
Color plays a significant role in stimulating a baby’s visual development. When it comes to DIY baby mobiles, there are countless color combinations to choose from. Let’s explore three popular color-based baby mobile options.
- Monochrome Baby Mobiles
Monochrome baby mobiles are a trendy choice for modern nurseries. They feature different shades of a single color, typically black and white. This high contrast stimulates the baby’s eyesight and promotes focus. According to a study by the American Optometric Association, infants prefer high-contrast, black-and-white visuals in their early months.
- Bright Color Baby Mobiles
Bright color baby mobiles are vibrant and eye-catching. They can include primary colors like red, blue, and yellow, or secondary colors like green, orange, and purple. These mobiles can stimulate a baby’s curiosity and help develop their color recognition skills. As per a study by the University of California, bright colors can capture an infant’s attention more than muted shades.
- Pastel Color Baby Mobiles
Pastel color baby mobiles offer a softer, more calming visual experience. They feature light, soothing colors like baby blue, soft pink, and mint green. These mobiles are ideal for creating a peaceful and relaxing environment for your baby. A study by the National Sleep Foundation suggests that soft, pastel colors can help promote a restful sleep environment for infants.
| Type of Baby Mobile | Colors Used | Benefits |
|---|---|---|
| Monochrome Baby Mobiles | Black and White | Stimulates eyesight, promotes focus |
| Bright Color Baby Mobiles | Red, Blue, Yellow, Green, Orange, Purple | Stimulates curiosity, develops color recognition |
| Pastel Color Baby Mobiles | Baby Blue, Soft Pink, Mint Green | Creates a peaceful and relaxing environment, promotes restful sleep |
Remember, the best color for your baby’s mobile depends on your personal preferences and your baby’s needs. Experiment with different colors and observe your baby’s reactions to find the perfect fit.
Homemade Baby Mobiles: Step-by-Step Guides
Creating a homemade baby mobile is a fun and rewarding project. Not only will you have a unique piece of nursery decor, but you’ll also have the satisfaction of knowing you made it yourself. In this guide, we’ll walk you through the process of creating a DIY Felt Animal Baby Mobile.
DIY Felt Animal Baby Mobile
This adorable baby mobile features a variety of felt animals that will captivate your baby’s attention and stimulate their developing senses. Let’s get started!
- Materials needed
- Various colors of felt
- Embroidery thread and needle
- Scissors
- Stuffing material
- Wooden hoop
- Fishing line or clear thread
- Step-by-step instructions
- First, draw or print out templates of your chosen animals. Cut out the shapes from your felt.
- Next, use the embroidery thread to add details to your animals, such as eyes, noses, and other features.
- Once you’ve finished adding details, sew two identical pieces together, leaving a small opening for stuffing. Fill with stuffing, then sew the opening closed.
- Repeat this process until you have a variety of animals.
- Attach the animals to the wooden hoop using the fishing line. Make sure to space them evenly and at varying heights for visual interest.
- Finally, attach a length of fishing line to the top of the hoop for hanging.
Here’s what you’ll need to create your DIY Felt Animal Baby Mobile:
Follow these steps to create your baby mobile:
And there you have it! A beautiful, homemade felt animal baby mobile that’s sure to delight your little one. Remember, the key to a successful DIY project is patience and creativity. Happy crafting!
DIY Paper Star Baby Mobile
Creating a DIY paper star baby mobile is a fun and rewarding project. Not only does it add a personal touch to your baby’s nursery, but it also provides a soothing visual stimulus for your baby. Let’s get started!
- Materials needed
Here’s a list of materials you’ll need:
| Material | Quantity |
|---|---|
| Cardstock paper (various colors) | 10 sheets |
| Star-shaped stencil or cookie cutter | 1 |
| Pencil | 1 |
| Scissors | 1 pair |
| String or yarn | 10 feet |
| Small hole punch | 1 |
| Wooden hoop or embroidery hoop | 1 |
- Step-by-step instructions
Follow these steps to create your paper star baby mobile:
- Prepare the Stars: Using your star-shaped stencil or cookie cutter, trace star shapes onto your cardstock paper. Cut out the stars with your scissors.
- Punch Holes: Use your hole punch to make a hole at the top of each star.
- Thread the Stars: Cut your string into various lengths. Thread one end of each string through the hole in a star and tie a knot to secure it.
- Attach to Hoop: Tie the other end of each string to your wooden hoop. Space the stars evenly around the hoop.
- Hang the Mobile: Attach four additional pieces of string to the hoop and gather them at a single point above the hoop. Tie them together and use this to hang your mobile from the ceiling.
And there you have it! Your very own DIY paper star baby mobile. This project not only adds a unique touch to your nursery decor but also helps in stimulating your baby’s visual development. Happy crafting!
DIY Nursery Decor: Beyond Baby Mobiles
When it comes to decorating your baby’s nursery, there’s so much more you can do beyond hanging a mobile. Let’s explore some creative DIY wall art ideas that can add a personal touch to your baby’s room.
DIY Wall Art for Baby’s Room
Creating beautiful wall art for your baby’s room is not only a fun project, but it also adds a unique and personal touch to the nursery. Here are two simple yet creative ideas you can try:
- Creating a Wall Gallery
- Handmade Wall Hangings
A wall gallery is a great way to showcase your favorite photos, artwork, or even your child’s own drawings. Start by choosing a theme or color scheme. You might want to use pictures from a recent family vacation, or perhaps you’d like to display a series of your baby’s first-year photos. Once you’ve selected your images, arrange them in a pleasing layout on the wall. You can use frames of different sizes and colors to add interest and depth to the gallery.
Handmade wall hangings are another fantastic way to add a personal touch to your baby’s room. You can create a simple fabric wall hanging using scraps of material in colors that match your nursery’s decor. Or, try your hand at a DIY macrame wall hanging. These can be made using a variety of materials, such as yarn, rope, or even strips of old t-shirts. The possibilities are endless, and the result is a unique piece of art that’s sure to be a conversation starter.
Remember, the key to successful DIY nursery decor is to have fun and let your creativity shine. Whether you’re creating a wall gallery or a handmade wall hanging, your baby’s room will be filled with love and personality.
DIY Baby Room Furniture
When it comes to decorating your baby’s room, the furniture you choose plays a crucial role. Not only does it need to be safe and comfortable for your little one, but it also needs to fit your style and budget. Here are two DIY options you can consider: refurbishing old furniture and building new furniture.
- Refurbishing Old Furniture
Refurbishing old furniture is a cost-effective and eco-friendly way to furnish your baby’s room. This method allows you to give a second life to pieces that may have been forgotten or discarded.
Start by choosing a piece of furniture. It could be an old dresser, a rocking chair, or a bookshelf. Then, clean it thoroughly and sand it down to remove any old paint or varnish. Once you’ve done that, you can repaint or re-stain it to match the color scheme of your baby’s room. Remember to use non-toxic, baby-safe paints and finishes.
Refurbishing old furniture not only saves you money, but it also gives a unique, personal touch to your baby’s room. Plus, it’s a great way to recycle and reduce waste.
- Building New Furniture
If you’re handy with tools and enjoy a challenge, building new furniture for your baby’s room could be a rewarding project. Whether it’s a crib, a changing table, or a toy chest, building your own furniture allows you to create pieces that are tailored to your needs and preferences.
Before you start, make sure you have a clear plan and all the necessary materials. Safety should be your top priority, so choose designs that are sturdy and free of sharp edges or small parts that a baby could swallow. Also, use non-toxic, baby-safe paints and finishes.
Building new furniture can be a time-consuming task, but the end result is worth it. You’ll have a one-of-a-kind piece that’s been made with love, and that will serve your child for years to come.
Whether you choose to refurbish old furniture or build new pieces, remember that the most important thing is to create a safe, comfortable, and welcoming space for your baby. Happy DIY-ing!
Parenting DIY Projects: Engaging Your Older Kids
As your children grow older, it’s essential to engage them in activities that not only entertain but also educate. One such activity is DIY (Do-It-Yourself) projects. These projects can be a fun and interactive way to teach your kids new skills while spending quality time together.
Teaching Kids to DIY
Introducing your kids to DIY projects can be a rewarding experience for both you and them. It’s not just about creating something new; it’s about learning, growing, and bonding together. Let’s explore the benefits and some simple projects to get started.
- Benefits of DIY for kids
- Boosts Creativity: DIY projects encourage kids to think out of the box and use their imagination.
- Develops Problem-Solving Skills: When kids encounter challenges during a project, they learn to find solutions, enhancing their problem-solving skills.
- Teaches Patience and Perseverance: DIY projects require time and effort. Kids learn the value of patience and the importance of perseverance to achieve their goals.
- Enhances Motor Skills: Many DIY projects involve cutting, painting, or assembling, which can help improve kids’ motor skills.
- Simple DIY projects for kids
- Homemade Playdough: This project is simple and safe. All you need is flour, water, salt, and food coloring. Plus, kids can play with the playdough once it’s made!
- DIY Bird Feeder: A bird feeder is a great project to teach kids about nature. You can make one using a pine cone, peanut butter, and bird seeds.
- Handmade Greeting Cards: Kids can make greeting cards for friends and family. This project can help enhance their creativity and expression.
DIY projects offer numerous benefits for children. Here are a few:
Here are some simple DIY projects that your kids can enjoy:
Teaching your kids to DIY can be a fun and rewarding experience. It not only keeps them engaged but also helps them learn valuable skills. So, why not start a DIY project with your kids today?
Creating a DIY Family Project
Engaging in a DIY family project is a wonderful way to spend quality time together. It not only fosters creativity but also teaches valuable skills. The process involves two main steps: choosing a project and dividing tasks.
- Choosing a Project
Selecting the right project is the first step towards a successful DIY family project. It’s important to choose a project that is age-appropriate and interesting for everyone involved. For instance, creating a DIY baby crib mobile could be a great project if you have younger kids. It’s a simple yet creative task that allows everyone to contribute.
When choosing a project, consider the skills and interests of each family member. This ensures everyone feels involved and excited about the project. Remember, the goal is to have fun and learn together, not to create a perfect end product.
- Dividing Tasks
Once you’ve chosen a project, the next step is to divide tasks. This is a crucial part of the process as it ensures everyone has a role to play. For example, in the case of a DIY baby crib mobile, one person could be in charge of cutting out shapes, another could paint them, and another could assemble the mobile.
Dividing tasks not only makes the project manageable but also teaches kids about teamwork and responsibility. It’s a great way to help them understand the importance of contributing to a shared goal.
Remember, the aim is not to finish the project quickly, but to enjoy the process. So, take your time, be patient, and most importantly, have fun!
In conclusion, creating a DIY family project is a rewarding experience that brings the family closer together. It’s a fun way to learn new skills and create lasting memories. So, why not start planning your next DIY family project today?
Conclusion: The Joy of DIY Baby Crib Accessories
As we wrap up our journey into the world of DIY baby crib accessories, it’s time to reflect on the process and look ahead to future DIY baby room ideas. The joy of creating something unique and special for your little one is truly unmatched.
- Reflection on the process
- Future DIY baby room ideas
Embarking on a DIY project can be a daunting task, but the rewards are immense. From the initial brainstorming of creative baby mobile ideas to the step-by-step guides for homemade baby mobiles, we’ve seen how each stage of the process brings its own set of challenges and triumphs. The satisfaction of seeing your baby’s eyes light up at the sight of their new crib mobile is a testament to the love and effort you’ve put into this project. The process of DIY not only results in a unique accessory for your baby’s crib but also fosters a sense of achievement and creativity.
Having mastered the art of DIY baby crib mobiles, it’s time to explore other DIY nursery decor ideas. From wall art to personalized blankets, the possibilities are endless. Engaging your older kids in these projects can also be a fun and educational experience. It’s a wonderful way to bond as a family while creating a warm and inviting space for your new addition. Remember, the goal is not perfection, but the joy of creation and the memories you make along the way.
In conclusion, the joy of DIY baby crib accessories lies not just in the end product, but in the journey of creation itself. It’s about putting your heart and soul into something that will bring joy and comfort to your baby. So, go ahead and unleash your creativity. The world of DIY awaits!